Monday, December 26, 2011

Wall of Mirrors

Way back in the summer I mentioned here I was putting together a wall of mirrors in our master bedroom and promised to show it to you. I finally completed it after a few years of collecting the perfect mirrors. I think it gives our room a really classy look and it really helps brighten up the space!!


This shot was a complete accident. I set the tripod on the bed to get a picture of the little mirrors, climbed up and looked in the camera and this is what I saw. I thought it looked really pretty with the blurred foreground so just had to share. 

I'm linking to the parties listed HERE and to:


Sunday, December 25, 2011

Merry Christmas!!


Fear not: for, behold, I bring you good tidings of great joy, which shall be to all people.  For unto you is born this day in the city of David a Savior, which is Christ the Lord. Glory to God in the highest, and on earth peace, good will toward men. Luke 2:10, 11, and 14. 

Merry Christmas friends! I hope you have a wonderful time with your families celebrating the birth of our Lord!!

Monday, December 19, 2011

Ornament Exchange

This year I participated in the ornament exchange hosted by Ashley over at Eisy Morgan. I got paired up with Shasta from The Magic of an Ordinary Day at Barefoot Cottage. She has a beautiful blog and takes gorgeous pictures! You should go check it out.

Shasta has two kids who I wanted to be the focal point of the ornament and I wanted to make something she could keep up all year if she wanted. So here is the ornament I made.


And here is the ornament Shasta sent me. 


Cute right!?! I think it matches my style and decor perfectly!! 


I'm linking to the ornament party at Eisy Morgan's


Pallet Cabinet Take 2

Remember the pallet cabinet my hubby built me back in October?!?


Guess what? He made me another one to go in between our fridge and stove! Here's what the space looked like before. 


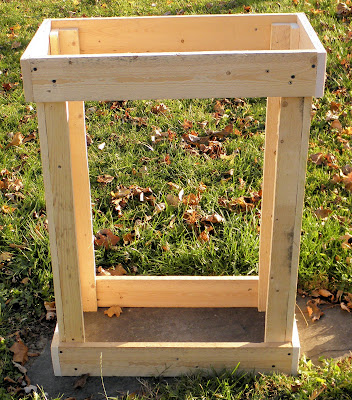
This time, he built me one with drawers! Here's his process. Let me know if you have any questions on how he made it.  

Side view of the frame

From view of the frame

Dividers for the drawers


Side

Back


Inside view of the 2x2's he installed so the drawers would pull out easily

Construction of the drawers. He added thin luan to the bottoms. (Sorry no picture of that)


I used a vinegar and steel wood mixture to stain the wood
 
Then I painted it white and sanded it with steel wool


I'm linking to the parties listed HERE and to:


Monday, December 12, 2011

Cutting Edge Stencil Winner

According to random.org, the winner of the Cutting Edge Stencils Giveaway is number 50 -

  Kelcie said...
              I like Cutting Edge on Facebook!
December 7, 2011 6:45 PM
 Congratulations Kelcie!!!!!!

And thank you to everyone who entered my giveaway! 
I really appreciate it!


Menu Chalkboard

Remember this post here where we helped my parents clean out one of their rental homes and I found all kinds of fun stuff - like this door?


I decided to turn it into a menu chalkboard to hang on our fridge. While the first coat of chalkboard paint was drying, I worked on making a bag to hold the chalk. I took a piece of scrap burlap, folded it in half, sewed up the sides, then turned it inside out. 

This is how it turned out. So easy!

Next I ruffled a piece of vintage lace and hot glued it around the top of the bag. I also glued on a little handle.

I hot glued 10 - yes, 10 magnets people! - to the back of the door. 

The 10 magnets didn't work at all, so as a temporary solution (until I get some stronger magnets) I used two magnetic chip clips to hold up the chalkboard.

Isn't it cute!?!?!?!


I love it!!

I'm linking to the parties listed HERE and to: