
Tuesday, January 31, 2012
Guest Posting at Decorating Insanity
Please come by Decorating Insanity today where I'll be sharing my top 3 most popular posts!!! I hope you'll stop over and say hi and take a look around Monica and Elaine's fabulous blog!!!
Sunday, January 29, 2012
Guest Posting at Uncommon
Hey everyone! I'm so excited to be guest posting over at Uncommon on January 31!! My post is part of their Love is in the Air Week Long Valentine's Series.

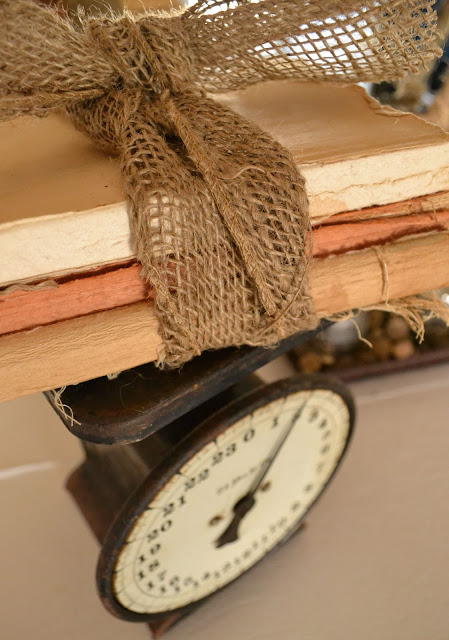
Here's a sneak peak of the Rustically Romantic Valentine's Vignette I put together.

You don't want to miss the posts from the other fabulous bloggers participating either! Their blogs are some of my favorites! Here's what Trish and Bonnie over at Uncommon have scheduled for the week:
Here's a sneak peak of the Rustically Romantic Valentine's Vignette I put together.

Sunday, January 29 Danielle from Blissful and Domestic
Monday, January 30 Lindsay with Southern Lovely
Wednesday, February 1 Uncommonly Yours Link Party
Thursday, February 2 Cameron with Homemade
Friday, February 3 Uncommon
Saturday, February 4 Wrap-Up and Features
I hope you'll check in all week long over at Uncommon! Stop by and see what we'll be sharing and leave some comment love! Hope to see you there!
Saturday, January 28, 2012
Attack of the Linen Closet
I was in organization mode again this weekend and tackled our beast of a linen closet. It was a little scary. I had no idea what I was going to find in there!

See what I mean....scary! Please tell me I'm not the only one whose closets end up like this.

After going through everything and filling a trash bag, here's the closet now!


I found the canvas storage bins at the Family Dollar for $2.00 a piece and painted numbers on the front!

Next weekend I'll be tackling the closet in my craft room.

Oh boy!

If you don't hear from me next Monday, send help!

I'm linking to the parties listed HERE and to:
Monday, January 23, 2012
A Spruced Up Space
Happy Monday! I had a great weekend cleaning, organizing, and rearranging my son's room. I also worked on sprucing up our laundry/mud/utility room which I'll be sharing with you today. I don't have a true before picture of the space (we repainted recently), but here it is:
 When you walk in from the back door, this is the area that you first see. As you can tell it's a tiny multifunctional space that we use as our laundry, utility, and mudroom. It's also where we keep our paper recycling and our tool pantry.
I've been wanting to do something with this area for a while mostly because (if you didn't notice) we have been using a paper box to hold our shoes and I was getting really tired of looking at it.

The box was supposed to be only a temporary solution until my husband built me a shoe rack. Other projects were a bigger priority so I kind of forgot about it until inspiration hit this weekend!
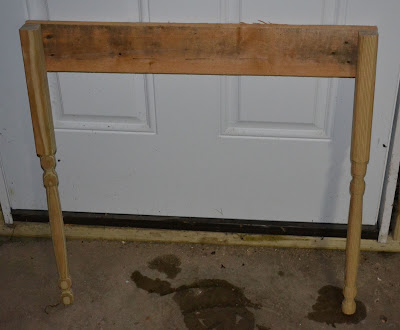
I remembered this shelf that I bought at an estate sale over the summer. It's been sitting in my garage waiting for me to decide where I wanted to use it. It's perfect for a shoe rack!!


Here's some close ups of the distressing on the shoe rack. I love the vaseline trick! It makes sanding so much easier!


I've been wanting to do something with this area for a while mostly because (if you didn't notice) we have been using a paper box to hold our shoes and I was getting really tired of looking at it.

The box was supposed to be only a temporary solution until my husband built me a shoe rack. Other projects were a bigger priority so I kind of forgot about it until inspiration hit this weekend!
I remembered this shelf that I bought at an estate sale over the summer. It's been sitting in my garage waiting for me to decide where I wanted to use it. It's perfect for a shoe rack!!

Our flooring has some grey in it, so using paint we already had and the vaseline trick I used on my shutters to shabby it up, here is the shelf now:

Next, I worked on cleaning and organizing the room and adding some fun laundry-ish decor, here's what the space looks like now!!!! Even with the ugly water heater and furnace, I think it looks so much better!


I love that I have a spot for hats, gloves and scarves now!

Here's some close ups of the distressing on the shoe rack. I love the vaseline trick! It makes sanding so much easier!


I'm linking to the parties listed HERE and to:
Savvy Southern Style
The House in the Roses
Between Naps on the Porch
Serenity Now
Boogieboard Cottage
Today's Creative Blog
The House in the Roses
Between Naps on the Porch
Serenity Now
Boogieboard Cottage
Today's Creative Blog
Friday, January 20, 2012
Guest Poster
Hi Friends! I have a great article to share with you today from Christina Johnson. Christina works remotely for Elliman Prudential in the New York City Apartments and Rentals market. She is using her journalism major to combine what she loves most, writing and her career. Her specialties include home decor design and DIY home improvement projects.
She has some wonderful tips. Enjoy!
Create a Cozy Environment in Your Home
Article submitted by Christina Johnson
If you notice your home is feeling a bit run down and cold, consider adding some touches to warm the space up. Interior design can be used to add coziness to your home, by paying attention to details like color, textile and lighting. Creating a cozy space for your friends and family will have them spending even more time together in the newly designed home.
Use textiles to create softness, even if you have hard, cold surfaces like tile or dark wood floors. Curtains in a fabric that begs to be touched, like velvet or micro suede, helps warm things up. A vibrant throw rug in a colorful pattern or one with soft, muted tones will cozy the place up. Plus, a friendly rug is the perfect spot for little ones to cuddle up and draw or play a game. Think of other fabric textiles like couch or armchair coverings. The materials on these pieces of furniture can add to the overall coziness of your space.
To further soften a room up, make sure there are plenty of cushions and blankets sprinkled around. Throwing pillows on the sofa and armchairs invite guests to settle in and relax. And a few blankets folded over the back of the couch or folded up in a pretty basket are convenient for cold winter nights. You can even stack large, over-sized cushions against a wall. These can be pulled out and used as extra seating if guests want to sit around the coffee table.
Don’t forget soft, ambient lighting to cozy up a home. Overhead lighting is ideal when you need to brighten a space up. For softer, dim lighting, choose table lamps scattered on end tables and counter tables. You can also place a small lamp on the counter in the bathroom, which makes for softer, cozier lighting than the fluorescent lighting usually installed in standard bathrooms. Pay attention to areas like the space above the dining table. This is the perfect spot to add a charming sconce or chandelier for ambient lighting while you eat.
Furthering the idea of cozy lighting, don’t forget to use candles to your advantage. A cluster of large candles on a coffee table or a few taper candles on the mantle will warm up the living room. Candles are also a nice addition in a dining room or bathroom. If you like, choose a chandelier for the dining room that uses candles instead of electric bulbs. You can also use small tea lights outside to cozy up a deck or on thin ledges where larger candles won’t fit. If you’re worried about a fire hazard or kids getting into the flames, use battery operated candles. These candles are safe to use and create the same cozy feeling associated with real flame candles in your home or NYC apartment.
Pay attention to color when coming up with ways to cozy up your home. Warm colors will add the feeling you want, while cooler colors can take the house away from the cozy vibe. Colors to use include burnt orange, amber, shades of scarlet and deep jewel tones, like emerald blue or eggplant. Stay away from shades like cream, pink, spring green or yellow. The warm colors can be used successfully on the walls. Paint is a quick, inexpensive way to instantly cozy up a space. Also use color to add depth and warmth to your home accessories, like blankets, pillows and curtains.
Don’t underestimate the effect living plants can have on a room. Adding pretty blooms or a houseplant to a room adds coziness and invites people in. You can choose your favorite fresh cut flowers and place them in a vase on a table. Or, add some potted house plants in a corner. This greenery also creates a welcome aroma, adding even more coziness to the space. If using flowers in a vase, remember to change the water regularly to keep them looking fresh. Likewise, water potted plants on a regular basis, to prevent brown leaves.
Monday, January 16, 2012
Kid's Pallet Table
This weekend my husband and I worked on building a table for our two year old son. We made it out of pallets - surprise, surprise! :) Are you getting tired of seeing my pallet projects? I hope not. I have a hard time passing up free wood, so you'll probably be seeing a lot more pallet wood around here.
Here is the basic frame my husband put together. The legs are actually deck spindles.

The base of the table is 21 x 21 inches, the height is 22 inches, and the tabletop (sorry we forgot to take a picture of that step) is 23 x 23 inches.

Once it was put together, I stained the top in dark walnut and painted the aprons and legs white.


We already had the chairs, but I stained the seat and painted the rest white to match the table.


So cute, right!?! Our son loves it! It was totally worth the $8 it took to make!

Here is the basic frame my husband put together. The legs are actually deck spindles.


The base of the table is 21 x 21 inches, the height is 22 inches, and the tabletop (sorry we forgot to take a picture of that step) is 23 x 23 inches.

Once it was put together, I stained the top in dark walnut and painted the aprons and legs white.


We already had the chairs, but I stained the seat and painted the rest white to match the table.


So cute, right!?! Our son loves it! It was totally worth the $8 it took to make!

I'm linking to the parties listed HERE and to:
Savvy Southern Style
The House in the Roses
Between Naps on the Porch
Serenity Now
Boogieboard Cottage
Today's Creative Blog
The House in the Roses
Between Naps on the Porch
Serenity Now
Boogieboard Cottage
Today's Creative Blog
Monday, January 9, 2012
Christmas Presents and a Winter Vignette
I took down all of our Christmas decorations on Friday. :( Our house looked incredibly bare, so I quickly put together a wintery vignette that will be staying up until I put together my Valentine's vignette for my guest post over at Uncommon at the end of this month! Before I share my winter decor, I first want to show you all the fun things I got for Christmas!


 |
| A sewing machine, printer block tray, mercury glass lamp, and a tool to pick up canning jars! |
 |
| I can't wait to hang this outside! |
 |
| And one of my favorite gifts - a new Nikon DSLR camera!!!!! |
And now for my winter vignette:


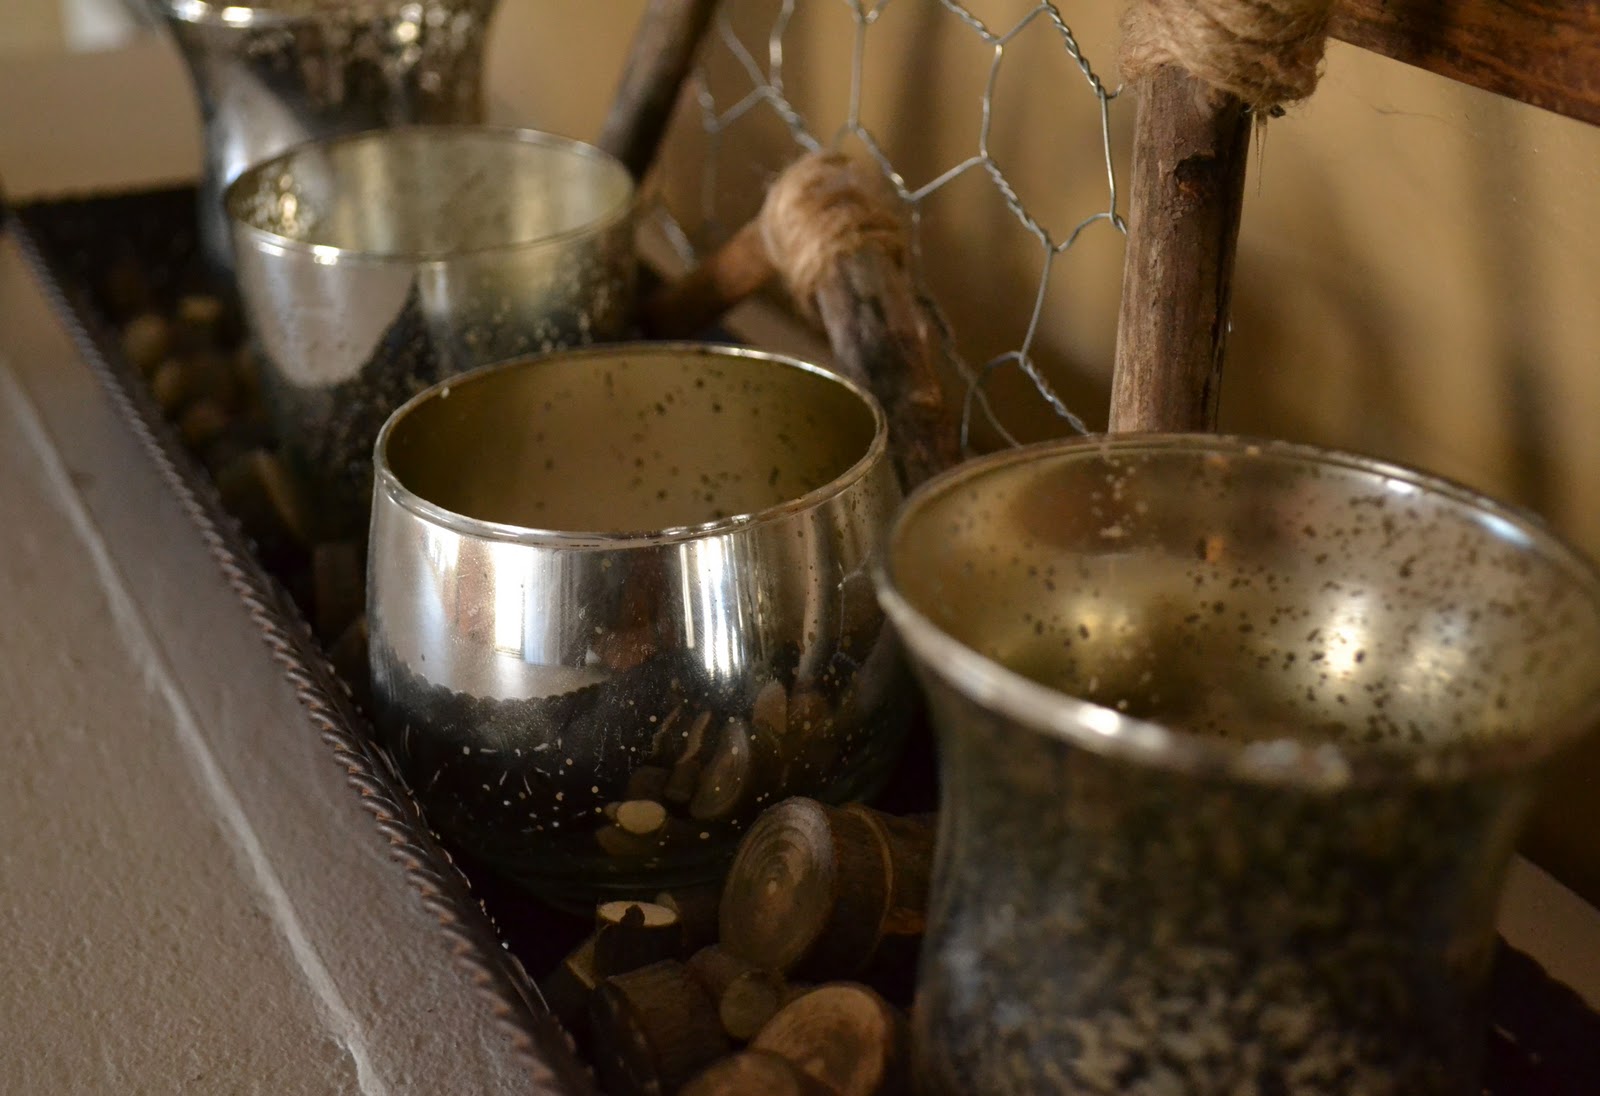


I've been trying to shoot in manual as much as possible to learn to use my camera, so all you camera pros out there - how are my pictures looking?
I'm linking to the parties listed HERE and to:
Savvy Southern Style
The House in the Roses
Between Naps on the Porch
Serenity Now
Boogieboard Cottage
Today's Creative Blog
The House in the Roses
Between Naps on the Porch
Serenity Now
Boogieboard Cottage
Today's Creative Blog
Monday, January 2, 2012
Drop Cloth Shower Curtain Tutorial
Way back in July when we redid our bathroom, my mom and I made a drop cloth shower curtain. When my mother-in-law saw it she loved it and asked for one for Christmas, so I thought I'd share a little tutorial on how we made it.


Fold it back up to the top. Now you'll have a pretty 15 1/2 inch valence like fold at the top of your curtain.


Next, we positioned brown grosgrain ribbon near the bottom of the valence where we wanted it and pinned it in place.


For the bottom of the curtain, we used a 4 foot x 8 inch piece of toile fabric, and 2 - 2 foot by 8 inch pieces of muslin. We sewed a piece of muslin on each end of the toile fabric. Then we used more of the brown grosgrain ribbon to cover the seams. (When you measure, be sure to add an inch or so on all sides for a seam allowance).


We positioned the fabric where we wanted it on the bottom of the curtain and pinned it in place.


Now, sew everything you have pinned: Sew the fabric along the bottom of your curtain.

The valence gets sewn along the top of your curtain and your grosgrain ribbon gets sewn on the bottom of your valence.

Next, starting 2 inches in from the side at the top of the curtain, place a pin every 6 inches. You should end up with approximately 2 inches left at the other end and have 12 pins along the top of your curtain.

Using your sewing machine, create a buttonhole where you have placed a pin.

Cut a slit in the center of each buttonhole to slip your shower curtain rings through.


Please let me know if you have any questions. I would be happy to answer them.
I purchased a 6 x 9 drop cloth from Home Depot.

Start out by folding the top of the drop cloth down 31 inches.

Fold it back up to the top. Now you'll have a pretty 15 1/2 inch valence like fold at the top of your curtain.

Pin in place along the top.

Next, we positioned brown grosgrain ribbon near the bottom of the valence where we wanted it and pinned it in place.


For the bottom of the curtain, we used a 4 foot x 8 inch piece of toile fabric, and 2 - 2 foot by 8 inch pieces of muslin. We sewed a piece of muslin on each end of the toile fabric. Then we used more of the brown grosgrain ribbon to cover the seams. (When you measure, be sure to add an inch or so on all sides for a seam allowance).

Sew on the ribbon.

We positioned the fabric where we wanted it on the bottom of the curtain and pinned it in place.


Now, sew everything you have pinned: Sew the fabric along the bottom of your curtain.

The valence gets sewn along the top of your curtain and your grosgrain ribbon gets sewn on the bottom of your valence.

Next, starting 2 inches in from the side at the top of the curtain, place a pin every 6 inches. You should end up with approximately 2 inches left at the other end and have 12 pins along the top of your curtain.

Using your sewing machine, create a buttonhole where you have placed a pin.

Cut a slit in the center of each buttonhole to slip your shower curtain rings through.

Now you're left with a gorgeous drop cloth shower curtain!!

Please let me know if you have any questions. I would be happy to answer them.
I'm linking to the parties listed HERE and to:
Savvy Southern Style
The House in the Roses
Between Naps on the Porch
Serenity Now
Boogieboard Cottage
Today's Creative Blog
The House in the Roses
Between Naps on the Porch
Serenity Now
Boogieboard Cottage
Today's Creative Blog
Subscribe to:
Posts (Atom)